Sunday, July 28, 2013

Flower Nails! Yay!


So I started off with a natural green for the base, this nail polish is quite thick so I only needed one coat. You might need two.


Once that is done you need to build your flowers out of little dots. I used a white for the centre of mine. I have this special little tool I use for making dots but a blunted toothpick or orange stick will work just as well.


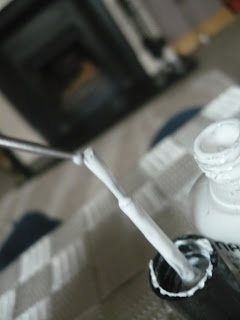
Put a blob on the end of your dotting stick (I have no idea what this tool is actually called!) Not too much or it will make a mess of your nail.

Put one or two white dots on each nail. Remember that each is the centre for a flower so don't put them too close together or near the edge of your nail.


You will need two more colours to make up the rest of the flowers, both of these are from Penneys and are pretty good for the price of them.

Using the same method as the white central dots put five dots circling the central one 


 Repeat for all the nails, leave them dry then apply a top coat! And there you have it, quick cute nails!

Wildly show them all to your friends and let them know where you got the idea!

Wednesday, July 3, 2013

Caviar Nails


GUYS!!! CAVIAR NAIL ART!!!
Why haven't I tried this before!! It is so cute, for my first try it's okay, I didn't use enough beads BUT still very cute, I couldn't decide on a colour so mixed up loads of of different ones!

Just paint a base coat on, let it dry then put a really thick layer of paint on and pour tons of beads onto it. Make sure you have a tray underneath to catch all the excess beads. Let the beads settle and press down on the nail gently, brush the excess beads off the side of your nail and voila!!
Let it dry for 15 minutes and apply a clear top coat.
I got a small set of 10 different colours for €1.50 in Dealz, I'd recommend getting a small set first, experimenting and then if you love it (which I know you totally will) buy a larger bag of beads from e-bay for like 99p!

Not my photo but they turned out exactly like this

Next time I do them I am going to put on plenty more beads than this.


(photo credit: www.nailart.ph)

Friday, June 21, 2013


Sorry I haven't posted in 3 weeks!

I've been on holiday in sunny Mablethorpe and I just wanted to post a couple of snaps to promote the Help The Heroes charity and the Royal British Legion.

There's a man called Christian who is walking the entire coast of Britain for charity and my Grandad got all dressed up in his uniform to greet him.
 

Check out https://www.facebook.com/christian.britain.3 to find out more about him.

There was also a gentleman called Jamie there who had had a stroke and hadn't walked since it, but Christian inspired him so much Jamie decided he would walk 60 paces with Christian.

And he did it YAY Jamie!!


Wednesday, May 29, 2013

Pastel Nails!

NEW POST!!! YAY!! I always get excited when it's new post day!

Nails today, nice summery pastelly yellows and purples!


I painted a base colour of purple, which I got from Primark/Penneys. It goes on really thick so I only needed one coat.

Tip: Paint the lightest colour as the base. I didn't and some of it went a funny colour.

I then cut some really thin strips of sticky tapes, put them on the thin strips on my nails on the places I didn't want to go yellow and then I painted quite a thick coat of yellow on top. I let this dry and then CAREFULLY removed the tape.

I left 2 nails solid colours because I thought that would break up the designs nicely and not make them too busy. I put dots on one of my thumbs because I couldn't think of anything else to do. :p


Don't forget to check out me Etsy shop:


Saturday, May 4, 2013


I know Wednesday has come and gone but I can't get my photos off my memory card onto my computer :( sorry!
I did paint very pretty nails but I can't show you the tutorial yet, bear with me please!


I am going to upload some photos of the jewellery I make though, which you can buy if you so desire, just visit my etsy shop called prettythingsimake or, because I might not have the item on Etsy, you can email me jazzieshaw@gmail.com.

I love the colour green, I think it's so versatile and you can find a shade to suit any complexion sooo..

Here's my Green Compliation!


These ones ^^^ are so adorable!! made with the standard pin and fish hook, there's 3 beads on the, the main one is gorgeous it's a clear glass bead with a pastel green centre and golden strips around the outside!


I adore the colour combo of this, apple green is a close second of my favourite greens, (the first being teal) the colourful detail really makes them pop! These were a bit more fiddly and complicated to make as I was using wire instead of the pins...


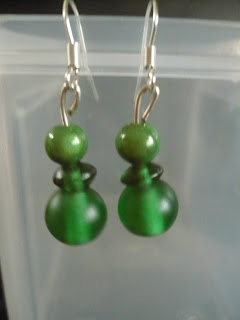
And finally! Simple and elegant dark green beads, the bottom beads have a matte finish, which you don't see very often with glass beads! These ones were made in the same basic way as the first.

So there you have it.
3 pairs of earrings.
3 different styles.

But all in fabulous GREEN!

Wednesday, March 20, 2013

Headbands


Just seen the launch of The Young Generation ooo looks exciting, might have to start a Youtube channel, 
check it out guys! :)

Well I'll continue here for now,
You know that hairband tutorial I posted last week. Well I've been getting busy and have made 2 or 3 more. Have a look! You can buy them on Etsy if you do so desire.


So I said just find something to stick on, but I didn't like anything I already had so I made my own toppers, this blue one is just loops and loops of ribbon with a gem on top. Last weeks was some funky bunched material with a role of it in the center as the bud.


 This was just some cute pastel buttons I found and stuck on! Cute huh?


I decided not to wrap this one with ribbon as I like the shiney silver look, The topper is folded over ribbon shaped into a bow, then I had a pretty flower thing lol that matched the colour so I stuck it on :)

Don't forget to check my Etsy shop
http://www.etsy.com/shop/PrettyThingsIMake?ref=search_shop_redirect